Guest Post: Sweet and Smoky Baby Back Ribs
These Sweet and Smoky Baby Back Ribs from my good friend David are perfect for your end-of-summer picnics this Labor Day Weekend. Or, save them for the fall and make them while tailgating at the game!
This post contains affiliate product links. Clicking on the links may result in my being paid a commission based on product sales. For more information, please review our site policies.
A huge thank-you to Michelle for allowing me to contribute my second guest post on Taste As You Go. (Check out my first guest post here.) I'm honored, and I hope that you all enjoy my twist on this summertime classic. These ribs are so delicious, you're going to want to eat them well into the fall... I mean, tailgate season is just around the corner, right?
Let's not waste time. Time to get to it!
Sweet and Smoky Baby Back Ribs
The Method:
When properly cooked, making ribs is an all-day affair. Maintaining the correct temperature for a lengthy amount of time can be labor-intensive... And many people have resorted to using their oven to make "good enough" ribs at home. Sure, you can wrap the ribs in foil, put water in the pan, or otherwise fiddle with the details... But these measures don't mitigate the fact that you're still baking them. And, let's be honest... When you think of oven-baked meats, the words "juicy" and "tender" likely don't come to mind. The oven provides a dry heat that can transform your succulent protein into shoe leather.
No, thank you.
For this reason, I have taken to using the slow cooker for ribs. They stay moist, juicy, and tender with little effort. And if you leave them long enough (8-10 hrs), they'll fall right apart.
You should eat ribs with your hands, though... so I'm sharing a few tips for a hybrid approach that uses the slow cooker and the Weber. The slow cooker breaks down the tissue, just as it does with a roast. The charcoal and wood chips infuse the flavors you expect when eating BBQ and allow plenty of the fat to drip away.
This recipe is perfect for a lazy Sunday. It takes at least half the day but it's worth it! Wake yourself up by 10 and you'll be safe! Despite the long cook time, this method is easy to follow and results in next to no mess.
Step 1: Make the rub.
You'll need:
1 teaspoon coarse ground pink Himalayan salt
2 teaspoons ground black pepper
1 teaspoon white pepper
1 teaspoon smoked Spanish paprika
3 tablespoons brown sugar
Mix the ingredients together well and set aside.
Step 2: Start the meat.
You'll need:
3 lbs baby back ribs, cleaned of the tough membrane
1 cup water
Start the baby back ribs in your slow cooker on the low setting. Put them bone-side down. If you have a smaller oval crock, then stand the rack of ribs on its edge. Pour the water in the crock and cook for 1.5 hours.
Once the ribs have cooked for a bit, coat them liberally with the rub mixture. The rub will help draw out the natural flavors in the meat. Replace the cover and continue to cook the ribs on low for another hour.
[Grilling time limited? Go ahead and cook the ribs in the slow cooker for a little longer. Keep in mind, though, that they may start to fall apart after 5 hours.]
Step 3: Prepare the grill.
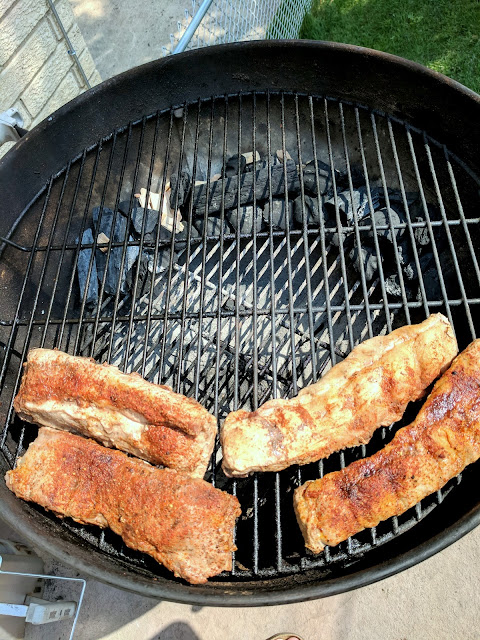
I used a mix of briquettes, hardwood lump charcoal, and a hickory smoking chips. Now... getting a rip-roaring mountain of charcoal all lit up like a huge inferno may be fun, but it'll burn and ruin your ribs. Save that for searing some steaks another time!
For an extended cook, arrange the briquettes roughly 2 x 2 around the back of your kettle like a snake. I lit the end with a long BBQ torch and Map-Pro gas. You'll find many methods of arranging coals for slow cooking online. But I find this one to be the simplest, and you don't run the risk of the temperature getting too low or too high. (My target was 225-250 for 4-5 hours.)
Step 4: Cook the ribs.
Lay the ribs far from the coals, adjusting the top and bottom vents so they are 1/8-1/4 open. Then put on the lid and walk away. NO PEEKING! If you see smoke seeping out and a nice low temperature on the thermometer, then you're good to go. I avoided the temptation to check the ribs by leaving for three hours to go swim with my kids.
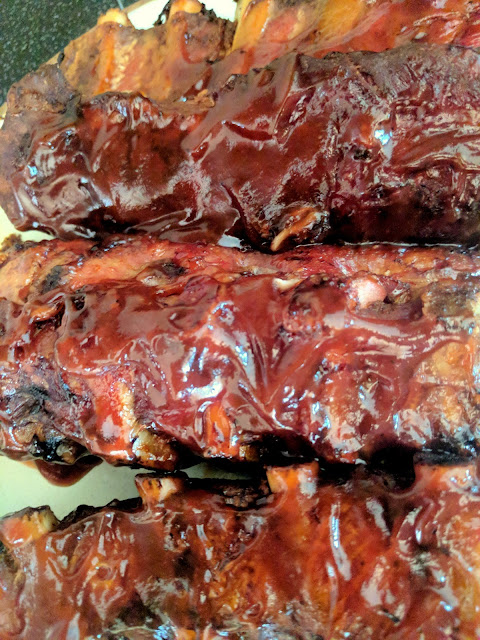
When I returned, all I had to do was sauce them and put them through a taste test... SO GOOD! I used Sweet Baby Ray's Original because it's gluten-free, and tasty, but you can use any sauce of your choice.
Don't deal with the sauce until the ribs have finished cooking. If you sauce them too early, the sauce will get thin and some will even impart a bitter burnt-out flavor. BBQ sauce doesn't soak into meat like a marinade so there is no real benefit that I can find to applying early. Go on and brush it on at the end.
Step 5: Serve/finish the ribs.
At this point, you can serve the ribs with your chosen sides and they will be amazing. But if you have time to rebuild your fire, here's what to do.
Pull off the ribs and tent with foil. Remove the top grate with tongs or grill mitts. Dump a pile of charcoal on top of the remaining coals, whatever's left of your snake. (I would only add about half a chimney-full or roughly 40 briquettes.)
Wait 15 minutes with the lid off for the new coals to catch, then replace the top rack. Put your ribs back on the rack and brush on your sauce. Cover the grill and wait 5 minutes. Turn the ribs, brush on more sauce, cover, and wait 5 more minutes. Repeat once or twice until you have a nice bark. Now eat and enjoy!
Step 6: Bonus!
If you're like me and hate to see a good fire go to waste, toss on a package of farmers' market local bacon. Then save the bacon for BLTs or chop it into bacon bits for salad. Just store in an air-tight container in the fridge until you're ready for it. We're planning to make a carbonara in a couple of days, and the bacon will have that nice smoke flavor to it -- can't wait!
For now... Happy Grilling!
Thanks for contributing, David! These ribs look dynamite... Wish we lived closer so we could enjoy them with you and your family!
-----
One year ago: Unique Home Decor and More from UncommonGoods {HOME}
Two years ago: Wish List: Minted Nursery Wall Art {HOME}
Three years ago: Summertime Nectarine Sorbet {RECIPE}
Four years ago: A Taste of Napa: Lunch at Tarla Mediterranean Grill - Napa, CA {TRAVEL}
Five years ago: On the Side: Milestones {BLOGGING}
Six years ago: Black and White Madeleine Cookies with Nutella Filling {RECIPE}
Seven years ago: Looking Back at the Tap and Table Gastropub {DINING}
Eight years ago: DeFrancesco Farm Stand {TRAVEL}
Nine years ago: Grilled Avocado and Tomato Roll-Ups {RECIPE}
Like this post? Connect with me to find out when I post again. Find me on Facebook, Twitter, Instagram, and Pinterest or sign up to receive updates via email!


